By: Twiglet
First Aid Hacks:
Repurpose an Ice Breaker Mint Container as a Pill Case
Ice Breaker mint containers are the perfect size for storing small pills or tablets. To repurpose an Ice Breaker mint container as a pill case, simply follow these steps:
- Clean and sanitize the container. Wash the container with warm water and soap, and then rinse it well. Make sure it is completely dry before proceeding.
- Prepare your medication. If your medication comes in blister packs or larger bottles, remove the pills you need and place them in a clean, designated area. Discard any packaging or inserts.
- Transfer the medication. Carefully place the desired amount of medication into the clean Ice Breaker mint container. Make sure to count and double-check the pills to ensure accuracy.
- Label the container. It's important to label the container to avoid confusion. Use a waterproof or permanent marker to write the name of the medication, dosage instructions, and any other relevant information on the container.
- Secure the lid. Ensure that the container is tightly closed to prevent the pills from spilling or getting exposed to moisture.
By repurposing an Ice Breaker mint container, you can easily carry a small amount of medication like ibuprofen in a convenient and compact manner. Just remember to keep the container away from extreme heat, moisture, and direct sunlight to maintain the quality and effectiveness of the medication.
Here are some additional tips for repurposing an Ice Breaker mint container as a pill case:
- If you have multiple medications, you can use different colors of Ice Breaker mint containers to keep them organized.
- You can also use a small piece of tape or a sticker to label the different compartments of the Ice Breaker mint container.
- If you are worried about the container opening accidentally, you can add a piece of elastic or a rubber band around the lid.
With a little creativity, you can easily repurpose an Ice Breaker mint container into a convenient and functional pill case.
How to Make a Portable First Aid Kit in an Altoids Tin
An Altoids tin is a great way to create a portable first aid kit for camping, hiking, or backpacking. It is small and lightweight, making it easy to pack and carry.
Materials:
- Empty Altoids tin
- Travel-sized medications: pain reliever, antacid, antiseptic wipes, antibiotic ointment
- Bandages
- Any other travel medications you may need
Instructions:
- Empty the Altoids tin by removing all the Altoids from it.
- Clean the container thoroughly to remove any residual dust or particles.
- Gather your medical supplies. Choose the essentials you may need for basic first aid, such as bandages, antiseptic wipes, antibiotic ointment, pain relievers, and any other medications specific to your needs. Opt for travel-sized versions of these items to ensure they fit in the container.
- Fill the Altoids tin with your medical supplies, ensuring you have enough to be prepared but not so much that the container cannot close properly. Arrange the items neatly inside the container, using small bags or ziplock pouches if needed to keep them organized and secure.
- Once the container is filled, close it securely.
Tips:
- Label the tin with the contents so you can easily find what you need.
- Check the expiration dates of any medications or supplies you include in the kit and replace them as necessary.
- Consider adding a whistle or other signaling device to your kit in case of an emergency.
With this portable first aid kit, you can be prepared for minor injuries or discomfort while enjoying the outdoors.
Here are some additional tips for making a portable first aid kit:
- Choose a tin that is the right size for your needs. You don't want it to be too big or too small.
- Consider the climate you will be in when choosing your supplies. For example, if you are going to be hiking in a cold climate, you will need to include items to treat hypothermia.
- Make sure you have a variety of bandages to treat different types of injuries.
- Include a few basic medications, such as pain relievers, antacids, and antihistamines.
- If you have any allergies, be sure to include medications to treat them.
By following these tips, you can create a portable first aid kit that will keep you safe and prepared while enjoying the outdoors.
Firestarter Hacks
How to Waterproof Your Matches
Matches are a necessity for camping trips, but they can easily get wet and ruined. To keep your matches safe and dry, you can waterproof them by following these steps:
- Select a small plastic container. Look for a container that is durable, waterproof, and has a tight-fitting lid. You can find suitable containers in outdoor supply stores, hardware stores, or even repurpose items like pill bottles or small food storage containers.
- Prepare the container. Ensure that the container is clean and dry before proceeding. Remove any labels or stickers, and make sure the lid is free of any debris that could interfere with the seal.
- Attach sandpaper. Cut a piece of sandpaper to fit the size of the container's lid. Use waterproof or all-weather sandpaper for better durability. Apply a thin layer of glue, such as a strong adhesive or epoxy, to the lid and press the sandpaper onto it. Allow the glue to dry completely before proceeding.
- Fill the container. Place your matches inside the container. You can either leave them in their original matchbox or transfer them into a small resealable plastic bag for extra protection.
- Seal the container. Ensure the container's lid is tightly closed to create a waterproof seal. Double-check the closure to make sure it's secure and won't accidentally open during transportation or while stored in your camping gear.
With your homemade waterproof matchbox, you can have peace of mind knowing that your matches will remain dry and usable, even in wet conditions. Remember to exercise caution when handling matches and follow proper fire safety guidelines during your camping adventures.
Here are some additional tips for waterproofing your matches:
- Use a clear container so that you can easily see how many matches are left.
- Label the container with the date and contents so that you know how long the matches have been stored.
- Store the container in a cool, dry place.
With a little care, your waterproof matchbox will keep your matches safe and dry for years to come.
How to Make Dryer Lint Firestarters
Using dryer lint and a toilet paper tube as a fire starter is indeed an effective and economical method. Here's a simple guide on how to create this fire-starting tool:
Materials you'll need:
- Dryer lint (accumulated from cleaning out your dryer's lint trap)
- Empty toilet paper tube or paper towel tube
- Optional: Wax or petroleum jelly (for added waterproofing)
Instructions:
1. Collect a sufficient amount of dryer lint by regularly cleaning out your dryer's lint trap. Store the lint in a dry place until you are ready to use it.
2. Take an empty toilet paper tube or paper towel tube. Ensure it is clean and free from any residual paper or glue.
3. Stuff the toilet paper tube with the dryer lint, compressing it gently but not too tightly. Fill the tube from end to end, leaving a small space at the top.
4. Optional: For added waterproofing and extended burn time, you can melt some wax (such as candle wax) or use petroleum jelly. Dip the filled tube in melted wax or smear petroleum jelly over the lint, coating it evenly. This step is particularly useful if you anticipate using the fire starter in wet conditions.
5. Allow the wax or petroleum jelly to cool and solidify before proceeding.
6. When you're ready to start a fire, place the prepared dryer lint and toilet paper tube fire starter in your fire pit or fireplace.
7. Build a small kindling structure around the fire starter, ensuring enough airflow for the fire to ignite.
8. Light the exposed ends of the toilet paper tube, and the dryer lint inside will catch fire easily.
The dryer lint acts as highly flammable tinder, while the toilet paper tube provides structure and helps the fire starter burn for a longer duration. This method is particularly useful when starting a fire in challenging conditions or when you want a reliable and convenient fire starter option. Remember to exercise caution when handling fire and follow fire safety guidelines while camping or enjoying outdoor activities.
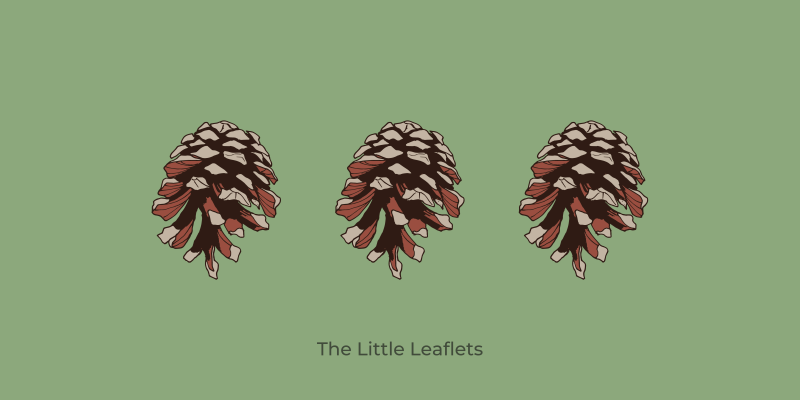
How to Make Pinecone Fire Starters
Pinecones are a natural and effective way to start a fire. They are flammable and have a pleasant aroma. Adding a wax coating can help prolong the burning time and ensure a more effective fire start.
Materials:
- Pinecones
- Wax (such as candle wax or paraffin wax)
- Double boiler or a heat-safe container for melting wax
- Tongs or a heat-safe tool for handling hot wax
- Optional: Wax paper or a drying rack
Instructions:
- Collect dry pinecones from the area around your campsite. Choose pinecones that are fully opened and not damp or wet.
- Prepare a double boiler or a heat-safe container filled with water for melting the wax. Place the wax in the top portion of the double boiler or in the heat-safe container.
- Heat the water in the double boiler or on low heat if using a heat-safe container. Allow the wax to melt completely, stirring occasionally.
- Once the wax has melted, use tongs or a heat-safe tool to dip each pinecone into the wax. Fully submerge the pinecone in the wax, ensuring it is coated evenly.
- Lift the coated pinecone out of the wax, allowing any excess wax to drip back into the container.
- Place the coated pinecones on wax paper or a drying rack to cool and harden. This will prevent them from sticking to surfaces.
- Once the wax has fully hardened, the pinecones are ready to use as fire starters.
To use the pinecone fire starters:
- Arrange your firewood or charcoal as desired in your fire pit or fireplace.
- Position the wax-coated pinecones strategically within the firewood, ensuring they have enough airflow to ignite properly.
- Use a match or lighter to light the wax-coated pinecones. The wax will help them burn longer, providing more time for the firewood or charcoal to catch fire.
Enjoy the crackling fire and the delightful scent of the pinecones as you warm up in the great outdoors!
Safety tips:
- Always exercise caution when handling fire.
- Follow fire safety guidelines while camping or enjoying outdoor activities.
- Keep pinecone fire starters out of reach of children and pets.
Tips:
- You can add color to the wax by adding wax dye or crayons.
- You can also add herbs or spices to the wax to give the fire starters a unique scent.
- For a more decorative touch, you can string the pinecone fire starters together with ribbon or yarn.
Comfort Hacks:
How to Use Hot Water Bottles in a Sleeping Bag
Hot water bottles can be a great way to stay warm while camping or backpacking. They are lightweight, easy to pack, and can provide hours of warmth.
Here are some tips on how to use hot water bottles in a sleeping bag:
- Use the right type of water bottle. Make sure the water bottle you use is designed for hot liquids and is leak-proof. You don't want any accidental spills inside your sleeping bag!
- Wrap the water bottle in a cloth or place it in an insulated sleeve. This will help to retain the heat and keep the water bottle from getting too hot.
- Test the temperature of the water bottle before you put it in your sleeping bag. You don't want it to be too hot, or you could burn yourself.
- Place the water bottle in a strategic location. You don't want it to be too close to your skin, or it could cause discomfort. I like to put mine near my feet or torso.
- Make sure the water bottle is tightly sealed. You don't want any leaks!
- Be aware of the duration of the warmth. Hot water bottles will stay warm for a few hours, but eventually, the heat will dissipate. If you wake up during the night, be careful when handling the water bottle, as it may still be warm.
Hot water bottles can be a great way to stay warm while camping, but it's important to use them safely. Always follow the manufacturer's instructions and safety precautions when using hot water bottles.
Here are some additional tips:
- Bring more than one water bottle so that you can rotate them out as they cool down.
- If you're camping in very cold weather, you may want to consider using a double-walled water bottle.
- If you're worried about the water bottle leaking, you can put it in a plastic bag before you put it in your sleeping bag.
With a little planning, you can use hot water bottles to stay warm and comfortable while camping.
Repair Hacks:
How to Lubricate a Zipper with a Candle
A candle can be used to lubricate a zipper in a pinch, making it easier to zip and unzip. Here are the steps on how to do it:
- Select a candle. Choose a regular wax candle that you don't mind using for this purpose. Be sure to use a candle made of wax and avoid using candles with added scents or oils, as they may leave residue on the fabric.
- Prepare the zipper. Make sure the zipper is clean and free from any debris or obstructions. Gently remove any dirt or threads that may be caught in the zipper teeth.
- Apply the wax. Open the zipper completely and rub the candle wax along both sides of the zipper teeth. Apply a thin layer of wax, focusing on the areas that are sticking or causing the zipper to malfunction. Make sure to cover the entire length of the zipper that needs lubrication.
- Work the zipper. After applying the wax, slowly and gently move the zipper up and down several times to distribute the wax and allow it to coat the zipper teeth evenly. This motion helps to work the wax into the zipper mechanism and improve its functionality.
- Wipe off excess wax. Once the zipper starts moving smoothly, use a clean cloth or tissue to wipe off any excess wax residue. This prevents any potential staining or transferring of the wax onto your clothing or other surfaces.
Tips:
- Be cautious when using a candle near delicate or flammable fabrics. Apply the wax carefully to avoid getting it on the surrounding fabric and take necessary safety precautions to prevent accidents or damage.
- This is a temporary fix and may not permanently resolve all zipper issues. For long-term solutions, it's advisable to replace a faulty zipper or seek professional repair if necessary.
Benefits:
- Candle wax is a natural lubricant that can help to improve the functionality of a zipper.
- It is a quick and easy fix that can be done at home with minimal tools.
- It is a cost-effective solution that can save you money on professional repairs.
How to Repair Holes, Tears, and Snags in Your Tent
Tents are designed to withstand the elements, but even the best tents can get damaged. Holes, tears, and snags can happen for a variety of reasons, such as sharp objects, rough surfaces, or even just wear and tear.
The good news is that most tent repairs are relatively easy to do. Here are some tips on how to fix holes, tears, and snags in your tent:
Holes and Tears in Tent Fabric
- Clean the area around the hole or tear with a mild soap and water solution. This will remove any dirt or debris that could interfere with the repair.
- Cut a patch of Tenacious Tape or similar repair tape (duct tape) that is slightly larger than the damaged area.
- Apply the tape over the hole or tear, pressing it firmly to ensure proper adhesion.
- Smooth out any air bubbles or wrinkles.
- If possible, apply the patch on both the inside and outside of the tent for added durability.
- Allow the tape to set and cure according to the manufacturer's instructions before using the tent.
Holes in Tent Netting
- For small holes in the mesh netting, you can use a bug mesh patch kit specifically designed for tent repairs.
- Clean the area around the hole with mild soap and water.
- Cut a patch from the mesh repair kit that is slightly larger than the hole.
- Apply a small amount of adhesive (usually included in the kit) to the edges of the patch.
- Press the patch firmly over the hole, ensuring all edges are securely attached.
- Allow the adhesive to dry and cure as per the instructions provided.
Snags in Tent Netting
- Gently work the snagged area back and forth with your thumb or fingers to realign the mesh back to its normal position.
- Take care not to pull or tear the netting further.
- If the snag is severe and cannot be fixed by hand, you may need to consider using a patch kit or replacing the netting if possible.
Prevention is Key
The best way to avoid tent repairs is to prevent damage in the first place. Here are a few tips:
- Avoid sharp objects or rough surfaces that could cause tears.
- Set up your tent in a suitable location to reduce the risk of snags or punctures.
- Regularly inspect and maintain your tent to address any minor issues before they worsen.
By following these tips, you can keep your tent in good condition and extend its lifespan.
Waterproofing Hacks
How to Reuse Silica Gel Packets
Silica gel packets are often found in new shoes, electronics, and other products to help absorb moisture. But once they've reached their absorption capacity, they're often thrown away. However, there are many ways to reuse silica gel packets, and here are a few ideas:
- Moisture prevention: Silica gel packets are excellent at absorbing moisture, so you can use them to protect items that are sensitive to humidity. Place them in airtight containers with items like electronic devices, photographs, important documents, or tools to help prevent moisture damage.
- Preserve freshness: Silica gel packets can help prolong the shelf life of certain products by reducing moisture. Place them in food storage containers or bags with items like dried herbs, spices, snacks, or seeds to maintain their freshness and prevent them from becoming stale.
- Prevent rust and corrosion: Rust and corrosion can be a problem for metal objects, especially when stored in damp environments. Placing silica gel packets in toolboxes, camera cases, or any other storage containers with metal objects can help absorb moisture and prevent rust formation.
- Protect against mold and mildew: Silica gel packets can be placed in closets, drawers, or any enclosed spaces where moisture buildup is common. This helps to inhibit the growth of mold and mildew, which can be harmful to fabrics, leather goods, and other susceptible items.
- Rescue wet electronics: If your electronic device accidentally gets wet, you can try placing it in an airtight container along with silica gel packets. The packets will help absorb moisture from the device, but it's still important to seek professional help if necessary.
How to Reactivate Silica Gel Packets
Over time, silica gel will reach its absorption capacity and may need to be replaced or reactivated. Some silica gel packets can be reactivated by drying them in the oven at a low temperature, following the manufacturer's instructions.
Safety Tips
- Keep silica gel packets out of the reach of children and pets, as they are not meant to be ingested.
- Do not eat or inhale silica gel particles.
- If you have any concerns about using silica gel packets, please consult a doctor or other healthcare professional.
By reusing silica gel packets, you can not only reduce waste but also make use of their moisture-absorbing properties in various practical ways.
Hygiene Hacks:
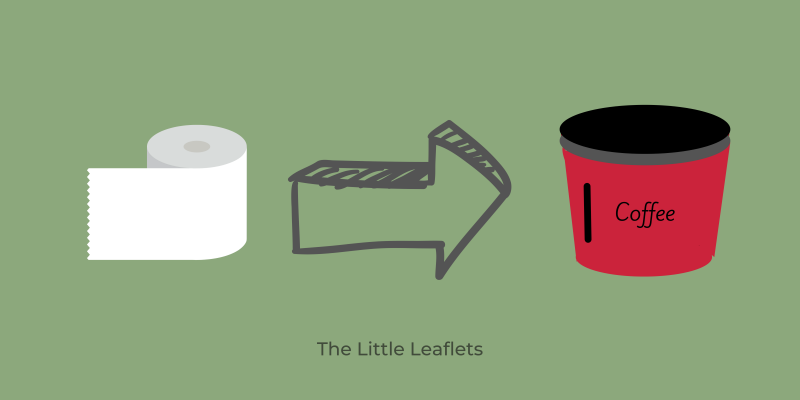
How to Make a Handy Toilet Paper Holder for Camping
Making a toilet paper holder for your camping trips is a practical and convenient way to ensure that you always have access to toilet paper when you need it. This DIY guide is simple to follow and can be made with materials that you may already have at home.
Materials:
- Empty plastic coffee canister or a similar container with a lid
- String or cord
- Toilet paper roll
- Scissors
- Marker or pen
- Hole punch (optional)
Instructions:
- Clean and dry the empty coffee canister thoroughly.
- Remove the lid from the canister and place it aside. Use a marker or pen to mark a small opening on the lid. The opening should be large enough for the toilet paper to be pulled through but small enough to prevent it from falling out easily.
- Use scissors to carefully cut out the opening you marked. Make sure the edges are smooth to prevent any tearing of the toilet paper.
- If you have a hole punch, use it to create a hole on one side of the canister near the top. This hole will serve as the attachment point for the string handle. If you don't have a hole punch, you can skip this step and create a hole using scissors.
- Cut a piece of string or cord that is long enough to serve as a handle. The length will depend on your preference, but make sure it is comfortable to carry. Thread the string through the hole you created in the canister and tie a knot to secure it.
- Take the toilet paper roll and remove the cardboard tube from the center. Insert the roll into the canister, threading the first sheet of toilet paper through the opening in the lid.
- Place the lid back on the canister, ensuring it fits securely.
Your handy dandy toilet paper holder is now complete! To use it, simply pull the desired amount of toilet paper through the opening in the lid, and carry it with you using the attached string handle. This way, you can have easy access to toilet paper whenever nature calls during your camping trips.
Tips:
- If you want to make your toilet paper holder more personalized, you can decorate the canister with paint, stickers, or other embellishments.
- You can also use a different type of container for your toilet paper holder, such as a Pringles can or a plastic food storage container.
- If you are going to be camping in bear country, it is a good idea to hang your toilet paper holder from a tree or other high object to prevent bears from getting to it.
Using Bread Tags as Clothespins for Camping
Bread tags are a clever camping hack for drying laundry. They are lightweight, easy to find, and can be used to secure clothes to a clothesline or rope.
Here are some of the advantages of using bread tags as clothespins:
- Lightweight and portable: Bread tags are small and lightweight, making them easy to carry in your camping gear.
- Easy to find: Bread tags are readily available and can be found in most kitchens or camping supplies. You can save the tags from loaves of bread you consume or ask friends and family to save them for you.
- Versatile: Bread tags can securely hold clothes onto a clothesline or rope, preventing them from falling off during drying. They are designed to hold bags closed, so they have a good grip that works well for securing clothes.
- Durable: Bread tags are typically made of sturdy plastic that can withstand outdoor conditions. They won't rust like metal clothespins, making them suitable for camping trips.
However, there are a few things to consider when using bread tags as clothespin alternatives:
- Size limitation: Bread tags have a small opening, so they might not work well for thicker or bulkier fabrics. They are better suited for lightweight clothing items like socks, underwear, and T-shirts.
- Wind resistance: Bread tags might not hold up as well as clothespins in windy conditions. If you anticipate strong winds, it's a good idea to use additional tags or consider alternative methods, such as using clips or binder clips.
- Environmental impact: While using bread tags as an alternative is resourceful, it's important to be mindful of environmental concerns. Plastic waste can accumulate, so try to reuse the tags whenever possible or consider eco-friendly alternatives like wooden clothespins.
Overall, using bread tags as a makeshift clothespin alternative can be a practical solution for drying laundry while camping. They are lightweight, readily available, and easy to use. Just keep in mind their limitations and ensure you have enough tags to accommodate your laundry needs.
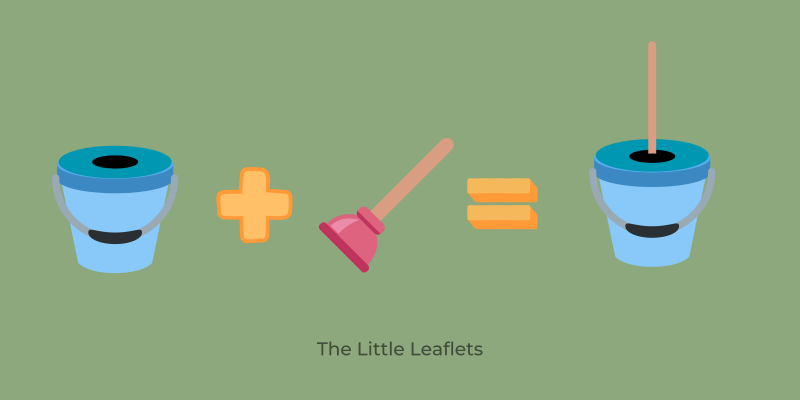
How to Make a Makeshift Washing Machine with a Bucket and a Plunger
A makeshift washing machine is a great way to clean your clothes when you don't have access to a traditional washing machine. This method is simple and easy to follow, and it only requires two basic materials: a bucket and a plunger.
Materials:
- A bucket with a tight-fitting lid or a bucket with a hole in the lid
- A plunger
Instructions:
- Fill the bucket with water. If you don't have access to a water source, you can fill the bucket with water from a water bottle or another container.
- Add a suitable amount of detergent to the water. The amount of detergent you need will depend on the size of your load and the type of detergent you're using. Follow the instructions on the detergent packaging for guidance.
- Place the clothes you want to wash into the bucket. Make sure not to overload the bucket, as this will prevent the clothes from moving around properly.
- If your bucket has a hole in the lid, secure it tightly with a piece of tape or a rubber band. This will prevent water from splashing out during the washing process.
- Insert the plunger into the bucket, covering the hole in the lid if there is one. Hold the plunger handle with both hands and move it up and down rapidly, creating a plunging motion. This action will agitate the clothes, simulating the washing machine's agitator.
- Continue plunging the plunger for several minutes to thoroughly agitate the clothes. You can vary the speed and intensity of the plunging to mimic different wash cycles (e.g., gentle or vigorous).
- After the clothes have been agitated sufficiently, remove the plunger and empty the soapy water. Refill the bucket with clean water and use the plunger to agitate the clothes again, rinsing off the detergent.
- Repeat steps 6-7 with fresh water as needed, depending on the level of dirtiness of the clothes.
- Once the clothes are clean, remove them from the bucket and squeeze out the excess water. You can do this by hand or using a towel.
- Hang the clothes to dry on a clothesline or any suitable area where they can be exposed to air and sunlight.
Tips:
- If you don't have a plunger, you can use a stick or a broom handle to agitate the clothes.
- If you're washing heavily soiled clothes, you may need to repeat steps 6-7 several times to ensure that they are properly cleaned.
- Be sure to rinse the clothes thoroughly to remove all of the detergent.
- Hang the clothes to dry in a shady spot, as direct sunlight can fade the colors.
This makeshift washing machine method may not be as effective as using a regular washing machine, but it can be a lifesaver in situations where you don't have access to modern laundry facilities.
How to Use Shower Caps to Protect Your Gear from Mud
Shower caps are a versatile item that can be used for a variety of purposes, including protecting your gear from mud. Here are some tips on how to effectively use shower caps for this purpose:
- Pack extra shower caps. It's a good idea to pack a few extra shower caps in your hiking or camping gear. This way, you'll have backups in case the ones you're using become torn or soiled.
- Separate muddy items. When packing your gear, designate a specific compartment or bag solely for muddy items. This could include your muddy shoes, dirty clothes, or any other gear that may have accumulated mud. Placing them all together in one location helps contain the dirt and prevents it from spreading to your clean belongings.
- Cover shoes with shower caps. Before placing your muddy shoes in your backpack or gear bag, slip a shower cap over each shoe. This will create a barrier between the mud and the rest of your belongings, keeping them clean and mud-free.
- Rinse off excess mud. Whenever possible, try to remove excess mud from your shoes and gear before packing them. This can be done by using a stick or brush to scrape off the majority of the dirt. By minimizing the amount of mud, you'll reduce the chances of it spreading to other items.
- Clean shower caps. Once you're done using the shower caps, be sure to clean them thoroughly before storing them away. Rinse them with water and, if needed, use mild soap to remove any residual dirt or mud. Allow them to air dry completely before packing them for your next outdoor adventure.
By following these tips, you can effectively utilize shower caps to separate and protect your clean clothes and belongings from muddy items, ensuring a more organized and hygienic hiking or camping experience.
Here are some additional tips:
- If you're packing a lot of muddy gear, you may want to consider using a large trash bag or tarp to create a makeshift mud barrier. This will help to prevent the mud from seeping out and getting on your other belongings.
- If you're hiking or camping in an area where there is a lot of mud, you may want to consider wearing waterproof shoes or boots. This will help to keep your feet dry and prevent them from getting muddy.
- It's also a good idea to bring a towel or other piece of cloth to wipe down your shoes and gear before packing them. This will help to remove any excess mud and dirt, reducing the risk of it spreading to your other belongings.
By following these tips, you can help to keep your gear clean and mud-free, even when you're hiking or camping in muddy conditions.
Cooking Hacks:

How to Make Portable Coffee Bags
Portable coffee bags are a great way to enjoy a cup of coffee while camping, hiking, or traveling. They are lightweight and easy to pack, and they can be made with just a few simple ingredients.
Here's how to make portable coffee bags:
- Gather your supplies: coffee filters, coffee grounds, and string or dental floss.
- Place a few scoops of coffee grounds in the center of a coffee filter.
- Gather the edges of the coffee filter and bring them together, creating a pouch or bag shape.
- Use the string or dental floss to tie the top of the pouch tightly, ensuring that no coffee grounds can escape.
- Trim off any excess material from the top of the pouch to make it neater if desired.
- Repeat the process for as many coffee bags as you need.
To make a cup of coffee, simply:
- Boil water using a camp stove, kettle, or any heat source available to you.
- Place one of the portable coffee bags in a cup or mug.
- Pour the hot water over the coffee bag, ensuring that all the grounds are fully saturated.
- Let the coffee steep for a few minutes, allowing the water to extract the flavor from the grounds.
- Remove the coffee bag from the cup, squeezing out any excess liquid into the cup.
- Add any desired condiments like sugar, milk, or creamer, and enjoy your freshly brewed cup of coffee.
Portable coffee bags are a simple and convenient way to enjoy a cup of coffee while on the go. They are lightweight, easy to pack, and can be made with just a few simple ingredients. So next time you're headed out for an adventure, be sure to pack a few portable coffee bags so you can enjoy a delicious cup of coffee no matter where you are.
Here are some additional tips for making portable coffee bags:
- Use your favorite type of coffee grounds.
- Experiment with different flavors of coffee to find your favorite.
- You can also add spices or herbs to your coffee bags for a unique flavor.
- Store your coffee bags in an airtight container in a cool, dry place.
With a little creativity, you can easily customize your portable coffee bags to suit your own taste. So get creative and enjoy!
Tic Tac Containers for Camping
Tic Tac containers are a versatile and convenient way to store herbs, spices, and salt for a camping trip. Their compact size and airtight seal make them ideal for keeping your ingredients fresh and easily accessible while on the go.
Here are some other ways to reuse Tic Tac containers:
- Carry baby powder or cleaning materials. These mini boxes are perfect for holding small amounts of powders, granules, or even liquids.
- Organize and store small items. Tic Tac containers can be used to organize buttons, beads, paper clips, or even medications like vitamins or pills.
Tips for Reusing Tic Tac Containers:
- Thoroughly clean and sanitize the containers before reusing them, especially if you're re-purposing them for food-related purposes.
- Label the containers with the contents so you can easily find what you're looking for.
- Use a marker or sticker to decorate the containers to make them more fun and personalized.
Conclusion
Tic Tac containers are a great way to store a variety of items, making them a versatile and eco-friendly option. With a little creativity, you can find many ways to reuse these small containers.

How to Store Cracked Eggs in a Bottle for Camping
Cracked eggs in a bottle can be a convenient and mess-free way to bring this breakfast staple on your camping trip. Here's a step-by-step guide on how to do it:
- Select a clean and empty plastic bottle with a secure lid. A water bottle or a reusable beverage bottle with a wide opening would work well for this purpose.
- Crack the desired number of eggs into a separate bowl or container. Carefully break each egg, ensuring that no shell falls into the bowl.
- Gently whisk the eggs together until the yolks and whites are well combined. This step is essential to prevent separation and make it easier to pour out the eggs from the bottle later on.
- Pour the whisked eggs into the empty plastic bottle. Leave some space at the top of the bottle to allow for expansion as the eggs freeze (if you plan to freeze them).
- Securely seal the bottle with its lid, ensuring that it's tightly closed to prevent any leakage.
- If you have access to a freezer, place the bottle in the freezer until the eggs are frozen solid. Freezing the eggs will help keep them fresh and prevent spoilage during your camping trip. If you don't have access to a freezer, you can skip this step and proceed to the next.
- Pack the bottle of cracked eggs in a cooler or insulated bag with ice packs to keep them cool during transportation.
- When you're ready to use the eggs, remove the bottle from the cooler and allow it to thaw in a safe location, such as your campsite's refrigerator or in a cool shaded area. If the eggs were frozen, ensure they are completely thawed before cooking.
- Once thawed, you can use the eggs in any recipe that calls for eggs, such as scrambled eggs, omelets, or even as an ingredient in pancakes or French toast.
Tips:
- Ensure the bottle and lid are clean and free from any contaminants.
- If the eggs were frozen, make sure they are properly thawed before use.
- Consume the stored eggs within a few days to ensure their freshness and quality.
Enjoy your delicious and protein-packed breakfast while camping!
Portable Pancake Mix for Camping
Making a portable pancake mix in advance for camping is a great way to enjoy delicious pancakes even when you're in the great outdoors. This recipe is simple to follow and can be stored in a ketchup bottle for easy squeezing.
Ingredients:
- 2 cups all-purpose flour
- 2 tablespoons sugar
- 2 teaspoons baking powder
- 1/2 teaspoon salt
Instructions:
- In a large bowl, whisk together the flour, sugar, baking powder, and salt until well combined.
- Transfer the pancake mix into a clean, empty ketchup bottle. You may need to use a funnel to make pouring easier.
- Seal the bottle tightly and label it for future use.
To make pancakes:
- Empty the desired amount of pancake mix from the ketchup bottle into a mixing bowl.
- Add liquid ingredients such as water, milk, or buttermilk to the pancake mix according to the instructions on the bottle.
- Stir the batter until it's smooth and lump-free.
To cook the pancakes:
- Heat a griddle or a non-stick skillet over medium heat and lightly grease it with oil or butter.
- Once the pan is hot, use the ketchup bottle to squeeze out small rounds of batter onto the griddle or skillet. Aim for mini pancakes to make them easier to flip.
- Cook the pancakes for 1-2 minutes on one side, or until bubbles form on the surface.
- Flip the pancakes using a spatula and cook for an additional 1-2 minutes on the other side, or until golden brown.
- Transfer the cooked pancakes to a plate and repeat the process until all the batter is used.
- Serve the pancakes with your favorite toppings such as maple syrup, fresh fruits, or whipped cream.
Enjoy!
Tips:
- For a richer flavor, you can add 1/2 cup of melted butter to the pancake mix.
- If you don't have a ketchup bottle, you can store the pancake mix in a zip-top bag or airtight container.
- To make gluten-free pancakes, simply use gluten-free flour.
- To make vegan pancakes, use plant-based milk and butter.
With this portable pancake mix, you can enjoy delicious pancakes even when you're camping. It's a convenient and tasty way to start your day in the great outdoors.
How to Make a Homemade Spoon from a Soda Bottle
A homemade spoon from a soda bottle is a simple and practical way to eat your food when you don't have a regular spoon available. Here are the steps on how to make one:
Materials:
- Empty soda bottle
- Scissors or sharp knife
Instructions:
- Choose an empty soda bottle that is made of sturdy plastic. Rinse it out thoroughly to remove any residue or odors.
- Use the scissors or knife to cut off the top section of the bottle, just below the neck where it starts to narrow.
- Smooth out the cut edges by trimming off any jagged or sharp parts. Be careful while handling the scissors or knife to avoid any accidents.
- Shape the cut section of the bottle into a spoon-like form. You can achieve this by cutting away a portion of the curved side, leaving a semi-circular shape with a slightly deeper hollow section.
- Test the spoon by scooping up some water or another liquid to check its functionality. Make any necessary adjustments to the shape or depth of the spoon until you're satisfied with its usability.
- Rinse the homemade spoon thoroughly to remove any plastic debris or residue from the cutting process.
Your homemade spoon is now ready to use! It may not be as sturdy or durable as a regular spoon, so be mindful of its limitations when using it for hot or heavy foods.
Safety tips:
- Always prioritize safety when working with scissors or knives. Take your time, and if you're unsure about your skills or the suitability of the materials you're using, it's better to find an alternative solution or utensil to ensure your well-being.
- Be careful not to cut yourself on the sharp edges of the bottle or the scissors/knife.
- Use a sturdy plastic bottle that will not easily break or deform when you're shaping it into a spoon.
- Rinse the homemade spoon thoroughly after each use to prevent the build-up of bacteria.
How to Use a Belt as a Dish Drying Rack for Camping
A belt can be a creative and convenient way to dry dishes while camping. This method is simple to set up and requires no additional materials, making it a great option for those who are looking for a budget-friendly solution.
Materials:
- Sturdy belt
- Tree or sturdy post
- Pegs or hooks (carabiners, S-hooks, or similar)
Instructions:
- Find a suitable tree or sturdy post near your campsite where you can attach your belt. Make sure it is at a convenient height and stable enough to hold the weight of your dishes.
- Wrap the belt around the tree or post at a comfortable height for you to reach the dishes. Ensure the belt is securely fastened around the tree or post. You can loop it through itself or use the buckle, depending on the type of belt you have.
- Attach pegs or hooks to the belt. Carabiners, S-hooks, or similar items work well for this purpose. Space them out evenly along the length of the belt, leaving enough room between them to hang your dishes without touching each other.
- Wash your dishes as you normally would, making sure they are clean and free from food particles.
- After washing, use the pegs or hooks to hang the dishes on the belt, ensuring they are securely fastened. You can hang plates, cups, utensils, and other lightweight camping cookware.
- Allow the dishes to air dry in the open air. The belt provides a clean and convenient space for drying, keeping the dishes elevated and away from potential dirt or debris on the ground.
- Once the dishes are dry, carefully remove them from the pegs or hooks. Ensure they are completely dry before storing them to avoid any moisture-related issues.
Tips:
- If you are camping in an area with a lot of wind, you may want to secure the belt with additional ropes or stakes to prevent it from blowing away.
- If you do not have any pegs or hooks, you can use other items, such as sticks or branches, to hang your dishes.
- You can also use a belt as a dish drying rack for your home if you have limited counter space.
By following these simple steps, you can easily set up a belt as a dish drying rack for your next camping trip. This is a great way to keep your dishes clean and organized while they dry, making your camping experience more enjoyable and efficient.
How to Repurpose a Shoe Organizer into a Camping Kitchen Organizer
A shoe organizer can be a great way to keep your cooking utensils and food prep supplies organized and easily accessible while camping. This is a simple and inexpensive project that you can do at home.
Materials:
- Shoe organizer with multiple pockets
- Hanging mechanism (rope, carabiners, S-hooks, or similar)
- Cooking utensils
- Food prep supplies (spices, small cutting boards, tongs, etc.)
Instructions:
- Choose a shoe organizer with multiple pockets that can accommodate your cooking utensils and food prep supplies. Look for one made of durable and water-resistant material, as it will be exposed to outdoor conditions.
- Clean and dry the shoe organizer thoroughly before use. If necessary, remove any tags or labels.
- Determine the hanging mechanism you will use. This can be a rope, carabiners, S-hooks, or similar items. Ensure they are sturdy and capable of supporting the weight of the organizer and its contents.
- Attach the hanging mechanism to the top of the shoe organizer. If using a rope, thread it through the holes or loops at the top of the organizer and tie knots to secure it. If using carabiners or S-hooks, attach them to the loops or grommets on the organizer.
- Find a suitable location to hang the organizer in your camping kitchen area. It can be hung from a tree branch, a pole, or any other sturdy structure that is above the ground and easily accessible.
- Fill the pockets of the shoe organizer with your cooking utensils and food prep supplies. Place items such as spatulas, tongs, knives, cutting boards, can openers, spices, and other small tools or ingredients that you need for food preparation.
- Organize the items within the pockets in a way that makes sense to you. For example, group similar utensils together or arrange them based on their frequency of use.
- Hang the shoe organizer in your chosen location, making sure it is secure and at a convenient height for easy access.
Tips:
- If you are camping in an area with a lot of wind, you may want to secure the organizer with additional ropes or stakes to prevent it from blowing away.
- If you do not have any hanging mechanisms, you can use other items, such as sticks or branches, to hang the organizer.
- You can also use a shoe organizer as a general-purpose storage solution for your campsite. For example, you could use it to store clothes, toiletries, or other items.
By following these simple steps, you can easily repurpose a shoe organizer into a practical camping kitchen organizer. This is a great way to keep your cooking utensils and food prep supplies organized and within reach whenever you need them. This setup helps you create a functional outdoor kitchen while maximizing space and keeping your campsite tidy.
Other Hacks
How to Make Your Keys Float with a Cork
Corks are naturally buoyant, making them a great way to keep your keys afloat if they accidentally fall into water. Here are some tips on how to make your keys float with a cork:
- Securely attach your keys to the cork. You can use a keyring, a small carabiner, or any other reliable method to fasten them. This will help prevent your keys from detaching and sinking even if the cork gets wet or submerged.
- Test the cork in a controlled environment. Before relying on this method in a real water situation, it's advisable to test it in a controlled environment, such as a bathtub or swimming pool. This way, you can assess how well the cork floats with your keys attached and make any necessary adjustments.
- Consider using a purpose-built keychain float. If you frequently engage in water activities or are concerned about key loss, you might consider investing in purpose-built keychain floats. These floats are designed specifically to keep keys buoyant and visible in water, offering a more reliable and durable solution.
Here are some additional tips:
- Use a large cork for more buoyancy.
- Choose a bright-colored cork so that your keys are easy to see in the water.
- Keep the cork clean and dry to prevent it from absorbing water and becoming waterlogged.
With these tips in mind, you can use a cork to keep your keys afloat and visible in water, making them easier to retrieve if they accidentally fall in.
Camping hacks are invaluable resources that can enhance your outdoor adventures. They can help you overcome common challenges and make your camping experience more enjoyable and convenient. By utilizing simple tricks and creative solutions, you can save time, energy, and money.
Add comment
Comments